
在我们日常使用高可用集群时,都会使用到负载均衡工具对多个节点的负载进行转发。这里就不得不提到我们常用的一个负载均衡工具Nginx,Nginx官方提供的免费版本功能相对简单,大部分情况下我们都是用其进行负载均衡,对于应用的状态主要是依赖于其他的监控工具。如果对于小型的团队来说,部署专门的监控工具还需要资源,使用Nginx对应用进行探活监控可以节约这部分成本。
首先安装Nginx
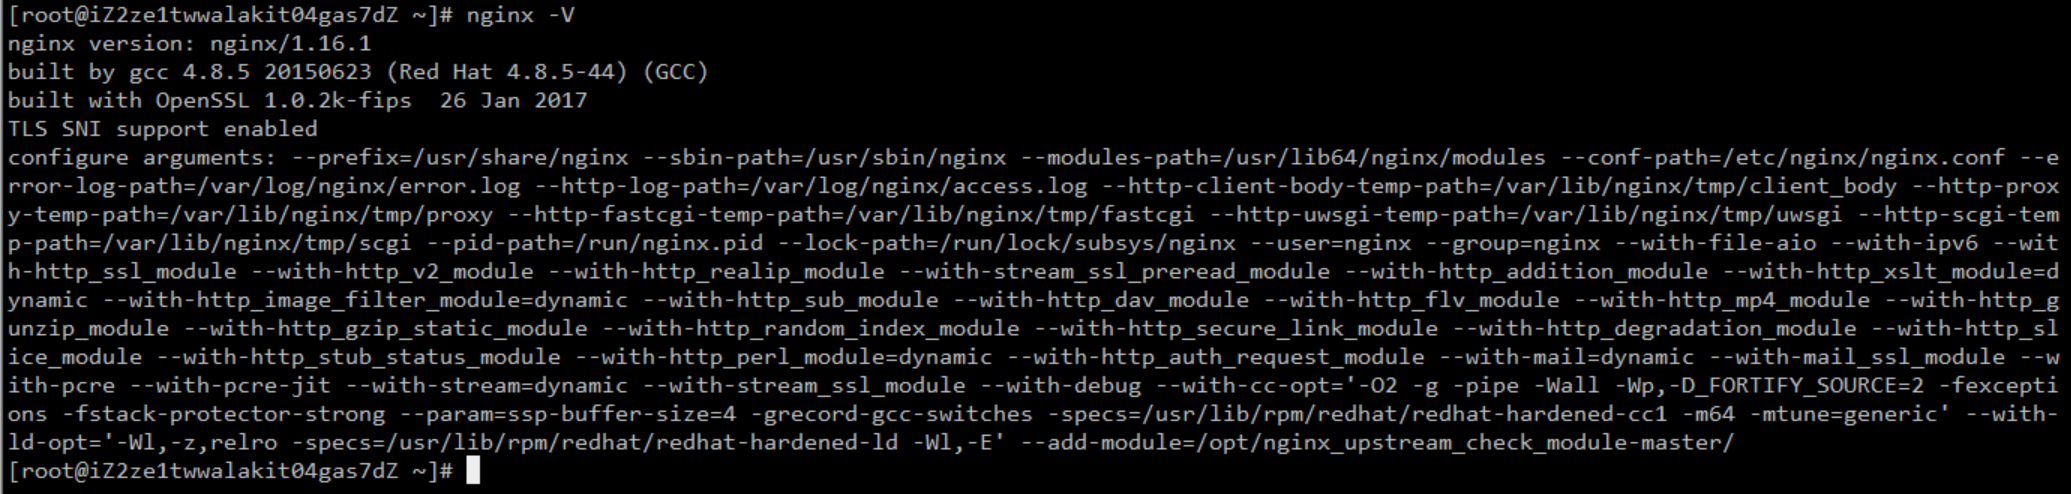
使用yum安装nginx我这里使用的是1.16.1版本
| yum install nginx |
安装完成后可以获取源码安装命令
| nginx -V |
安装Nginx探活插件
下载源码与探活插件
| wget https://nginx.org/download/nginx-1.16.1.tar.gz
wget https://github.com/yaoweibin/nginx_upstream_check_module/archive/refs/heads/master.zip |
Nginx使用源码编译安装相关的依赖包
| yum install pcre pcre-devel openssl openssl-devel gd gd-devel zlib patch libxml2-devel libxslt-devel perl-devel perl-ExtUtils-Embed perl zlib-devel patch |
解压源码和插件包,我这里将两个软件包全部放到/opt下面进行解压
| tar zxvf nginx-1.16.1.tar.gz
unzip nginx_upstream_check_module.zip |
patch探活插件到Nginx源码中
| cd /opt/nginx-1.16.1
patch -p1 < /opt/nginx_upstream_check_module-master/check_1.16.1+.patch |
执行源码编译安装,添加http探活插件
| ./configure \
–prefix=/usr/share/nginx \ –sbin-path=/usr/sbin/nginx \ –modules-path=/usr/lib64/nginx/modules \ –conf-path=/etc/nginx/nginx.conf \ –error-log-path=/var/log/nginx/error.log \ –http-log-path=/var/log/nginx/access.log \ –http-client-body-temp-path=/var/lib/nginx/tmp/client_body \ –http-proxy-temp-path=/var/lib/nginx/tmp/proxy \ –http-fastcgi-temp-path=/var/lib/nginx/tmp/fastcgi \ –http-uwsgi-temp-path=/var/lib/nginx/tmp/uwsgi \ –http-scgi-temp-path=/var/lib/nginx/tmp/scgi \ –pid-path=/run/nginx.pid \ –lock-path=/run/lock/subsys/nginx \ –user=nginx \ –group=nginx \ –with-file-aio \ –with-ipv6 \ –with-http_ssl_module \ –with-http_v2_module \ –with-http_realip_module \ –with-stream_ssl_preread_module \ –with-http_addition_module \ –with-http_xslt_module=dynamic \ –with-http_image_filter_module=dynamic \ –with-http_sub_module \ –with-http_dav_module \ –with-http_flv_module \ –with-http_mp4_module \ –with-http_gunzip_module \ –with-http_gzip_static_module \ –with-http_random_index_module \ –with-http_secure_link_module \ –with-http_degradation_module \ –with-http_slice_module \ –with-http_stub_status_module \ –with-http_perl_module=dynamic \ –with-http_auth_request_module \ –with-mail=dynamic \ –with-mail_ssl_module \ –with-pcre \ –with-pcre-jit \ –with-stream=dynamic \ –with-stream_ssl_module \ –with-debug \ –with-cc-opt=’-O2 -g -pipe -Wall -Wp,-D_FORTIFY_SOURCE=2 -fexceptions -fstack-protector-strong –param=ssp-buffer-size=4 -grecord-gcc-switches -specs=/usr/lib/rpm/redhat/redhat-hardened-cc1 -m64 -mtune=generic’ \ –with-ld-opt=’-Wl,-z,relro -specs=/usr/lib/rpm/redhat/redhat-hardened-ld -Wl,-E’ \ –add-module=/opt/nginx_upstream_check_module-master/ |
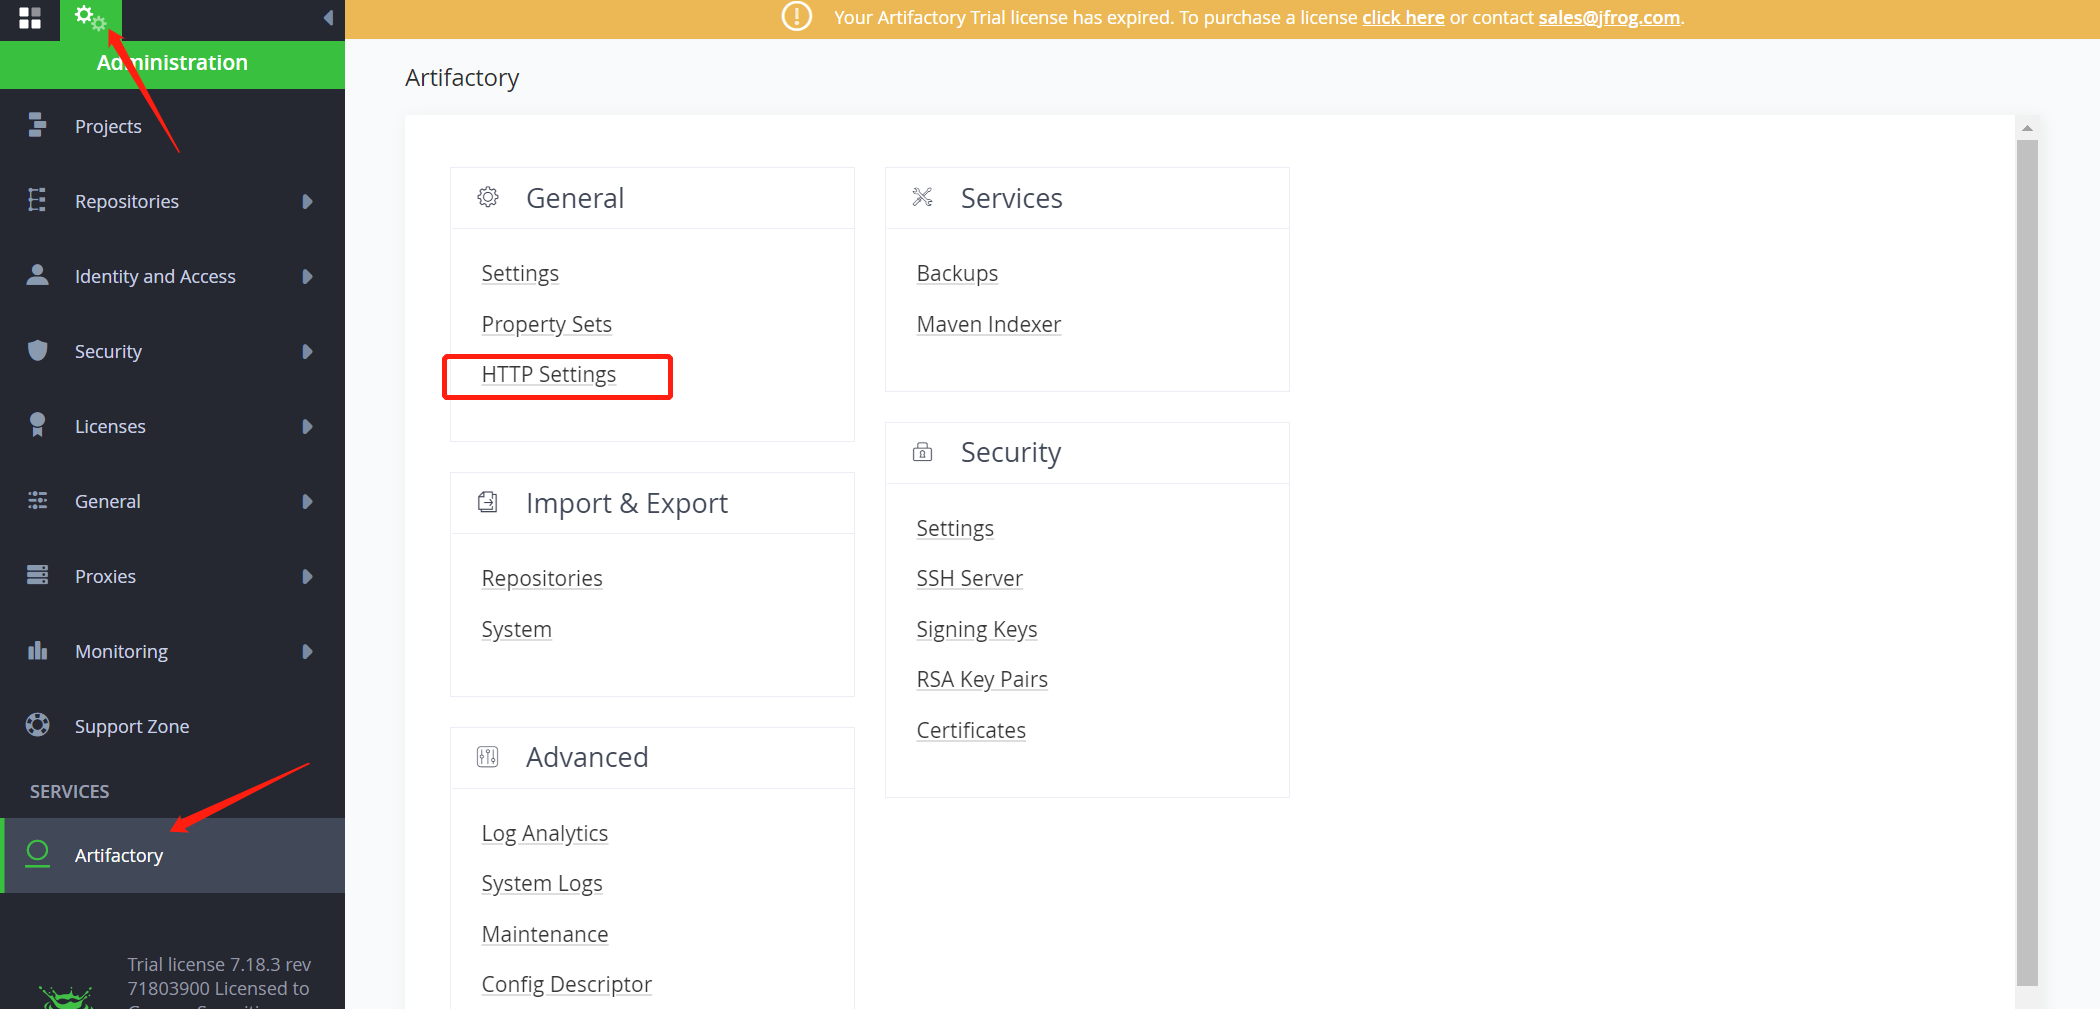
使用Nginx负载Artifactory
Nginx可以作为Artifactory制品库的负载均衡器,用来负载Artifactory多个节点间的请求,Artifactory也可以自动生成Nginx配置文件,具体操作参考下图
配置探活
生成配置文件后,使用探活插件的配置方法,在Nginx的config 文件中进行配置。具体样例如下:
| upstream artifactory {
server 192.168.1.2:8082; server 192.168.1.3:8082; check interval=2000 rise=2 fall=2 timeout=1000 type=http; check_http_send “HEAD / HTTP/1.0\r\n\r\n”; check_http_expect_alive http_2xx http_3xx } upstream artifactory-direct { server 192.168.1.2:8081; server 192.168.1.3:8081; check interval=2000 rise=2 fall=2 timeout=1000 type=http; check_http_send “HEAD / HTTP/1.0\r\n\r\n”; check_http_expect_alive http_2xx http_3xx } server {
listen 80 ;
server_name artifactory.external.io; if ($http_x_forwarded_proto = ”) { set $http_x_forwarded_proto $scheme; } ## Application specific logs ## access_log /var/log/nginx/artifactory.external.io -access.log timing; ## error_log /var/log/nginx/artifactory.external.io -error.log; rewrite ^/$ /ui/ redirect; rewrite ^/ui$ /ui/ redirect; chunked_transfer_encoding on; client_max_body_size 0; location / { proxy_read_timeout 2400s; proxy_pass_header Server; proxy_cookie_path ~*^/.* /; proxy_buffer_size 128k; proxy_buffers 40 128k; proxy_busy_buffers_size 128k; proxy_pass http://artifactory; proxy_set_header X-JFrog-Override-Base-Url $http_x_forwarded_proto://$host:$server_port; proxy_set_header X-Forwarded-Port $server_port; proxy_set_header X-Forwarded-Proto $http_x_forwarded_proto; proxy_set_header Host $http_host; proxy_set_header X-Forwarded-For $proxy_add_x_forwarded_for;
location ~ ^/artifactory/ { proxy_pass http://artifactory-direct; } } location /status { check_status; access_log off; } } |
探活配置成功之后访问,预置的location可以看到当前负载应用节点的健康状态
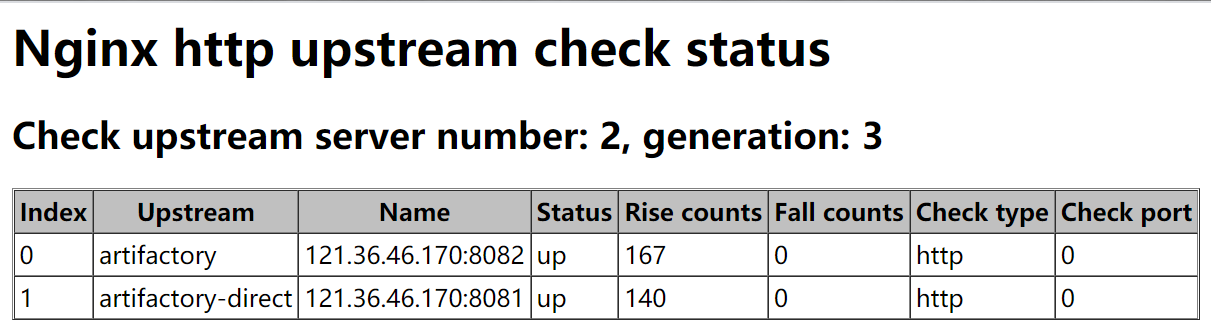
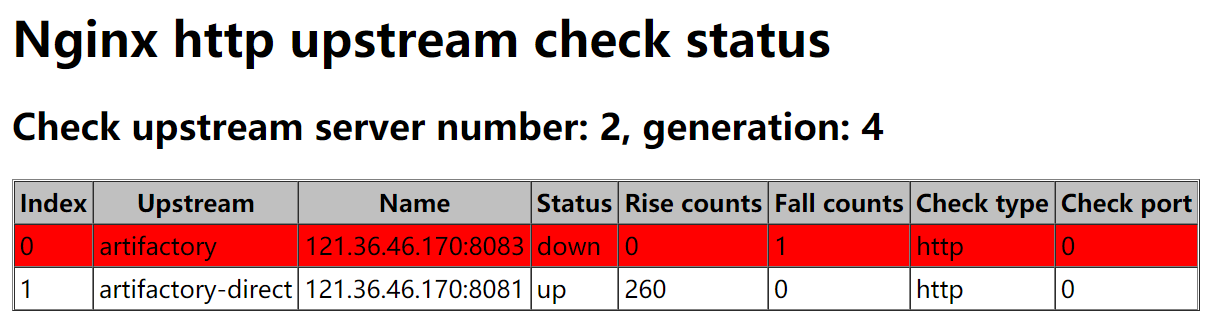
并且还支持json格式查看,方便我们进行数据采集


登录后评论
立即登录 注册